Showing posts with label Scribe Post. Show all posts

Thursday, May 27, 2010

Heart Dissection!


Today, everyone was very excited because we were going to start dissection! However, before we could do that, Ms. D went through the rest of the Chapter 3 Notes (that can be found on Moodle)


She also reminded us that on Tuesday, June 1st we will have our last QUEST and the last IMPORTANT GRADE OF THE YEAR! Some things to remember for the test are: how to know if something is alive (Movement Respiration Sensitivity Growth Reproduction Excretion NRG/Nutrients; MRS GREN), and the Skeletal and Circulatory Systems. It would also be wise to read about the Digestive and Respiratory Systems. For anyone who has any questions, there will be a study session during lunch on Monday. You can also study the Google Doc notes we took in class to which you were all invited (Cell Notes N, V, and K).


After we went through this we got to start the dissection part of class. We were seated in groups of 2 or 3 and we were each handed a dissecting pan and the equipment (we only used the forceps, scissors, and the blunt probe). Most of us got gloves, but a couple people preferred to be bare-handed.

The first part of the dissection, once everything was set up, was exploring the outside of the heart and looked for the following things: left side of the heart, right side, dorsal (back) side, ventral (front) side, superior (upper) side, inferior (lower) side, apex, coronary vessels aorta, pulmonary arteries, pulmonary veins, superior vena cava, and the inferior vena cava. We could find all this using our heart diagram from the packet (also found on Moodle). Not until we found all of this and showed it to Ms. D could we move on and actually start dissecting!


The second part also consisted of searching for parts of the heart, this time for the right atrium, the left atrium, the aorta, the pulmonary arteries, the superior vena cava, the inferior vena cava, the left ventricle, the right ventricle, the mitral valve, the tricuspid valve, the aortic valve, the pulmonary valve, and the right ventricle.


Once Ms. D had checked to be sure that we knew the parts, we could clean up, and answer the questions due on Friday. These can be found on Moodle labelled as "Heart Dissection".


Here are some videos I found on the topic of dissection:


  • Pig Heart Dissection-Not too clear at some parts, but this video has some cool facts and it's a great way to see if you didn't quite feel that you dissected the heart correctly...

  • Heart Anatomy-For people who need to see the heart at work!

Lastly, I will tell you how this relates to our daily life. I find it very important to know what is going on inside of you everyday, all your life. Dissection is a great way to learn and see what goes on inside our bodies (or animal bodies). Also, it helps squeamish people get past their fears!


Things due tomorow!


  • Heart Dissection Answers


  • Comment by 4:00 P.M. (Remember! 3 for 8th grade, 3 for 7th grade and 2 for 6th grade)

And remember to check Moodle to see what we are doing for the rest of the year!


The next (and last) scribe is VANCE!


-------------------------------------


Take care of your body. It's the only place you have to live. ~Jim Rohn


-------------------------------------


Added Notes:


I found dissection a bit gross, and a bit weird, but a very cool and fun way to learn about the body. Though, the cow heart was pretty big and couldn't be laid in the pan so that we could see both side's internal parts at the same time. But, I personally can't wait to dissect again!


The tools we used in were the forceps (tweezers), scissors, and the blunt probe. A blunt probe is "a long, slender instrument for exploring wounds or body cavities or passages. " (From WikiAnswers) In my group we used it to figure out where the blood vessels we found let to as well as to poke at the heart in smaller holes.

a blunt probe


Wednesday, May 26, 2010

Tuesdays science class


Hello 7th grade,

Tuesdays class started off with checking if everyone did their homework. A reminder to everyone, you should keep doing your homework and not stop because it is the end of the year. Ms D also told us that we are going to dissect on Thursday and that we can decide with whom we want to work together. We then got our cell labs back. After that, we started going over the muscular system and the chapter 3 notes. After that completed the heart and the circulatory system diagrams.

Here are just some of the questions and answers that we reviewed during class.

Section 3: the Muscular System

How many muscles approximately are in the human body?

The human body has approximately 600 muscles.

What are three types of muscle tissue?

· Skeletal muscle (biceps/triceps)

· Smooth muscle (stomach/blood vessels)

· Cardiac muscle (heart)

What is a tendon?

A tendon is a strong connective tissue that attaches muscle to bone.

Section 5: The Skin

What are the five main functions of the skin?

· Protecting the body

· Maintaining temperature

· Eliminating wastes

· Gathering information

· Producing vitamin d

Uv

Gamma

X ray

IR

Visible

Radio

Microwave

Ms D also told us about this man who had a led filling in his teeth. He could hear special radio signals because of the led filling.

Chapter 3

Section 1: The Body’s Transportation System

What does the cardiovascular system include?

· Heart

· Blood vessels

· Blood

What are its main functions?

· Removing wastes (CO2 out)

· Delivering needed materials (gets O2 to cells)

· Fighting disease (NRG and nutrients C,N,O,H get to cells)

Arteries- caries red blood and nutrients to cells (from heart to body)

Veins- caries blue blood and waste from cells (from body to heart

Capillars- arteries plus veins meet= O2 nutrient exchange for waste. Most of them in lungs/ alveoli

What we learned in class relates to life because we now know more about what we have inside our body and how our body works. We can also take better care because we know what organs need.


Homework and reminders

Human system quest on June 1st ( there is going to be a study session on Monday may 31st during lunch.

Next Blog comment

Link to moodle http://zagreb.ceesa.net/course/view.php?id=105

The next scribe is .......... KKKAAATTT and Gio


Friday, May 21, 2010

March 21, 2010 Class

Hello 7th Grade

During class on Friday we handed in our Cell Project that was due on Friday. After that we went over our notes on Section 1: Body Organization and Homeostasis and Section 2: The Skeletal System. We discussed some topics regarding of what we are learning.

We also filled out the diagram concerning the different bones in the Skeletal System. We labeled the different parts of the bones in the Skeletal System.

If you follow this link ( http://www.encognitive.com/images/skeletal-system.jpg ) it will take you to a picture of a skeletal system with its bones labeled. It will help you fill out the diagram.

For those who weren't here, these are some important notes (NOT ALL) we discussed during class.


Section 1: Body Organization and Homeostasis

- Homeostasis: Process of internal environment keeping balanced and stable. (Not being affected by outside environment)

Example of Homeostasis: When the internal body temperature is close to 37°C despite the temperature of the air around you. (Except when you're sick.)

Things that disrupts Homeostasis: Stress, Illnesses (Cold etc...)


Section 2: The Skeletal System

- 5 Major Functions of the Skeletal System

a) Provides shape and support

b) Enables movement

c) Protects Organs

d) Produces blood cells

e) Stores minerals/material until they are used

Joint: A place where two bones meet. Allows bones to move in different ways.

Two kinds of joints: Immovable & Movable

Immovable Joints: Allows little/no movement. Ex. Joints at skulls.

Movable Joints: Allow body to make wide range of movement.

Ligaments: Connective tissues. Hold bones in movable joints.

Cartilage: Connective tissues. Flexible than the bone. Cover ends of bones. Keeps from bones rubbing against each other.

Four ways of how joints work

- Hinge Joints: Allow forward/ backward motion. Ex. Elbow

- Ball-and-Socket Joints: Allow greatest range of motion. Ex. Joint in shoulder

- Pivot Joint: Allows one bone to rotate around another. Ex. Neck

- Gliding Joint: Allows one bone to slide over another. Ex. Wrist & Ankle.

Osteoporosis: Condition where the bones lose minerals and break easily. Occurs when the bones lack calcium.


The picture on the left shows how a normal bone looks like. The picture on the right shows a bone with Osteoporosis.

During our discussions at the end of class we were discussing relationship science has to the world. We were talking about where (in the world) we think Osteoporosis occurs the most. Some people thought it was China because of the population and the number of Asians who are lactose intolerant. Others thought is was Africa because of economic state and how they are not able to afford milk, which contains an abundance of calcium. Ms. D told us that people in Africa obtains calcium by putting calcium in their bread! We ended our class with the discussion.

http://kidshealth.org/teen/your_body/body_basics/bones_muscles_joints.html If you visit this link it talks more Body, Muscles, and Joints. So some of the information may help you when you're studying!

Homework!!!

- Email Ms.D about Bodies Revealed (Due Tuesday, March 25th)

- Write Notes for Chapter 3

- Comment to 6th/7th/8th Blog

You could go on Moodle (http://zagreb.ceesa.net/course/view.php?id=105) to check more information about the following weeks!

Remember to bring COLOR PENCILS to class on Tuesday.

Next scribe is ANTONIA!!!

Thursday, May 20, 2010

Bodies Reveald

Hi you are currently looking at my blog post about my class’s field trip.

The seventh grade class of AISZ went to an amazing trip to Bodies Revealed. It was related to our science class because next we are going into the human body. The expedition showed us people’s bones, mussels, nerves, lungs, brain, heart, kidney and much more. In my opinion, the coolest thing that we saw was unborn babies in tubes. It showed us how the baby looks like inside his mom’s belly. Another really cool thing we saw was the blood vessels of the human body.
DID YOU KNOW?! If we stretch our blood vessels we will have 100,000 miles of them!
NOW YOU KNOW!

We went into a room about smoking and saw what a healthy lung and a smoker’s lung. In that room, there was a box and a sign that said that smoking kills and that they what the smokers to live longer. It also said to through away your cigarettes into the box.
DID YOU KNOW?! Every cigarette takes 3 hours and 40 seconds of your life!
NOW YOU KNOW
!
The brain was nice to see because they cut the brains into strips to show us the difference.
DID YOU KNW?! A woman’s brain is 2.5% of their body’s weight but a man’s is only 2%!
KNOW YOU KNOW!
The man who started the expedition said this quote:
"Why all this interest in the human body? The answer to this question seem quite clear to me: your body is the only thing you carry with you from the moment you are born until your very last breath.”
- Dr. Roy Glover, Medical Director.
Overall this was a very fun and I think most people will do it again!
Don’t forget to email Ms. D. about the trip by Tuesday.
Next scribe is Julia.

Class; Thursday, May, 2


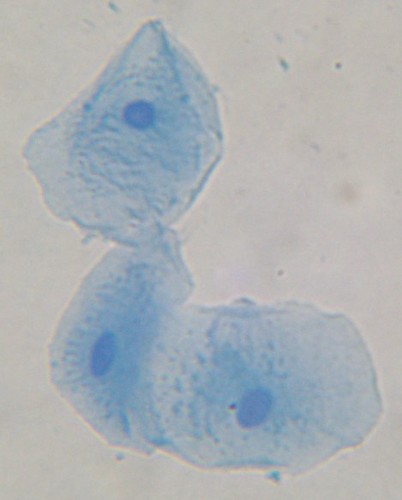
In class we continued the Cell Lab which the former scribe briefly described. Today however we looked at onion cells (a plant cell unlike our cheek cell which is an animal cell). We peeled the skin off the outside of the onion to do this. First we looked at them with water at 40x magnification then drew what we saw. Then we added a drop of methyl blue stain and looked at it again with 40x magnification and drew what we saw again. After that we looked at cell at 100x magnification. This was more detailed and we could see more of the cell. I personally thought that the onion cells were more interesting than the cheek cells. I found the folded parts of the onion skin very interesting. However we were supposed to avoid this as much as possible because Ms. D. only wanted us to see the flat part so we could see all the aspects of the cell. For the final part of the lab we had to answer three questions about our observations. If you have anymore questions about the lab the instructions can be found on the 7th grade Moodle.

After we finished the lab Ms. D. passed around some slides with interesting materials on it. There were three with skin, one with bone, and one with a plant ( I forget the name). They all looked very interesting under a microscope and if you have the chance you should look at them. Next MS. D. took out a microscope that when you put it in front of something it showed that. It wasn't a conventional microscope. It hooked up to the computer and we looked at some things that couldn't be put on a slide. Some examples of these are an eye, fabric, a paperclip, and writing ( very large on the screen).


For the remainder of class we discussed our note taken on chapter 1. We did not get very far because we were off task a lot talking about random things related to the human body (will be explained in description). Our first question was on the levels of organization of the human body. In the discussion we went past and before the human body. Ms. D. told us the whole chain. It is as follows (smallest to largest):
Quarkselectrons/protons/neutronsatomsmolecules
organelles
cells
tissue
organs
organ systems
organism
species
genus
family
order
class
phylumkingdom

Then we listed the six kingdoms of life which all this living matter falls under.

The second question past without exaggeration but on the third question when we were talking about the types of tissue we discussed how epithelial tissue lines the inside of the stomach. From this we went into what stomach acid could do to you. We found out that it could make an ulcer and cause you extreme discomfort and if it leaked out the acid could dissolve your whole body until you literally were just skin and bones. You would then starve to death because all you reserves would be gone( a terrible way to die). Again when we were talking about connective tissue we somehow got to bone marrow transplants. We learned that in order to do have a successful operation you couldn't be "put to sleep" but a needle had to be stuck through you skin and bone into the marrow. This method is also used in a spinal tap but that is in between two vertebra. The two next question were what was an organ or organ system. Originating from that question we discussed what would happen if you didn't have some of your organ systems. All of them got to the same point: you wouldn't be here. In the case of the excretory system the waste would build up inside you and you would swell until you burst sending body flying everywhere. This shows that all of the systems are important, no matter how unimportant they seem.

What we did in class today directly relates to real life in many ways. We were looking and discussing parts of us for one thing. This knowledge will hopefully help us understand ourselves better.
Here is a link to a video that animates human body features and movements
enjoy.

After finishing everything we had our break and went to the bodies revealed exhibit which will be explained by the Noam and she will chose the next scribe.


May 18, 2010


Hi everyone, I will be talking about the class of May 18, 2010. So, today we started using the microscopes to see cells and we started the cell lab.


This cell lab had a very specific way to see the cells. You had to first rub the inside of your mouth with a toothpick. Then you pour a couple drops of Methyl blue onto a glass slide. Then you placed the cells in the Methyl
blue and stirred it with the toothpick. You placed the cover slip (a plastic slip) at an acute angle to the glass slide and you dropped it. If you did this correctly, then the Methyl blue would spread across the cover slip and leave no air bubbles. We drew pictures of our cheek cells with magnifications of 40 & 100, although some people had a microscope with more lenses, who could see at a whopping magnification of 400 times. We could see the nucleus, cytoplasm, mitochondria, and cell membrane of the cell. Some of us managed to get onto the second step, which involved seeing onion cells, but I personally didn't see what they were like.

We also spent some time talking about the field trip to "Bodies Revealed". As you probably all know, "Bodies Revealed" is an exhibit full of the bodies of people who donated themselves to the cause. You can see all sorts of human parts, such as the lungs of a smoker, the brain, and even things such a baby in a bottle. Don't worry, all of the babies died of complications. None came from abortions. That's pretty much it. Thanks!


The next scribe is Noam for the trip, Bryce for the class.

Friday, May 14, 2010

Microscopes and Cells


Hello everyone!


On the 13th and 14th of May in Science class we have showed our cell project to our classmates and we have worked on an assignment in order to discove
r the mycroscope!

For the cell project we were supposed to find a common object from our house that meets the function of the organelles (little organs) within the cell and with it make a 3D diagram of a cell!


As for the Microscope project we learned what the different parts of a Microscope are as you can see on the left:
  • Ocular Lens (Eyepiece)
  • Body Tube
  • Revolving Nosepiece
  • Arm
  • Objectives (there are 3 or 4 of them on a normal microscope)
  • Stage
  • Stage Clips
  • Diaphragm
  • Light Source
  • Coarse Adjustment Knob
  • Fine adjustment knob
  • Base
What we did was partner up with someone and cut the letter "e/E" from a magazine. After that we took a microscope, a beaker with water, a pippete, two glass slides and two cover slips. We put the "e/E" on the glass slide and put a drop or two on it. We then dropped the cover slip from a vertical position onto the "e/E" in such a way that no air or water bubbles will remain. After that we looked trough the eyepiece of the microscope trough the smallest objective (4x, but with the eye piece = 40X). We then saw that the "e/E" was seen upside down because the light refracts trough 5 lenses. If hte number is even then you will see the "e/E" as it is but if the number is odd you will see it upside down. Then we made a formula to find out the magnification power of a microscope.

Here it is:

Magnification of eyepiece (e.g. 10 x) multiplied by Magnification of objective (e.g. 100 x) = Total magnification (1000 x)


Lastly, Ms. D told us what homework we have which is the blog comment, to read chapter one in our book and take notes from it.


The next scribe is Alix

Tuesday, May 11, 2010

Science Class on Friday May 7th and Tuesday May 11


Hello seventh graders!


Due to M.A.P examinations on Friday, we didn't do much in class. During class we watched a few videos and we just relaxed and had fun because everyone came at different times. We watched our K'nex video once again and then we watched other interesting and fun movies about: the volcano erruption, the new satellite launched and the enormous boulder in Norway! We also had to show Ms. D that we finished highlighting the packet that had given to us on Thursday. We also got reminded about our next project! It is called: Cell Project and it is due Thursday May 13th. The directions are on Moodle and are under May 10-16th.

The link to our Science Moodle site is:
http://zagreb.ceesa.net/course/view.php?id=105


At the beginning of Tuesday's class we talked about the Cell project and Ms. D made sure that we understood everything. Then we got back our Superhero's that were outside on the bulletin board. We then went over all the different parts of Animal and Plant cells once again and then we colored in Plant and Animal cells and we learned which parts are which! After that activity we wrote some more notes in our notebooks and Kat, Viktor and Noam took notes on Google Docs. The links to each of them are:
Kat's notes
https://docs.google.com/Doc?docid=0Acp6r0zJBnnzZGhtNjNjOW1fOHBiZGZtOGdy&hl=en&pli=1
Viktor's notes
https://docs.google.com/Doc?docid=0Acp6r0zJBnnzZGhtNjNjOW1fOHBiZGZtOGdy&hl=en&pli=1
I couldn't put up Noam's notes because I wasn't invited to her notes yet.

Today's notes were about Microscopes. We learned what microscopes are, and they are instruments that make small objects look bigger! We then wrote down:
Simple Microscope:
-only one lens is used

Compoung Microscope:
-uses more than one lens
-magnifies more!

Electron microscope:
-usess electrons
-amazing image - Resolution - sharpness or clearness and clarity of image


Later on, instead of writing and copying from the board, we were passed out a packet about microscopes. This packet is also on Moodle. It is under the same category as the directions to the Cell Project!

All in all, in these two classes we covered more about parts of cells and we learned about microscopes as well! These two concepts that we learned more about relate to everyday life because first of all, cells are parts of human beings and we are human beings all our life! Everything we see that is alive has cells in it! Microscopes relate to everyday life because with them we discovered many new ideas and we will continue to in the future!!!

The next scribe is.... CiPrIaN!!!! :=)

Monday, April 19, 2010

The Final Week of Individual K'NEX

Hello everyone!
First of all, let me welcome you to the fourth quarter! The blogging directions are a bit different for this quarter; we have to make three minor comments to the 8th grade blog(http://aisz810.blogspot.com), two minor comments to the 6th grade blog(http://aisz610.blogspot.com, starts May 1st), and three minor comments to the 7th grade blog(this one, http://aisz70910.blogspot.com). We have to make AT LEAST ONE MINOR COMMENT PER WEEK! These are the dates the comments are due:

April 16th , April 23rd , April 30th , May 7th,

May 14th , May 21st , May 28th , June 4th

The reflection post is due June 4th.


Now, in class this week, we have been working with K'NEX - this was the final week of building individual constructions! We were working mainly on pulleys and gears. We did not have to answer questions about the gears, we just had to show Ms. D that it worked. Next week we will make the big, combined K'NEX construction. All teams have passed the 35-credit limit!


We do not have any homework except for posting the comments to the blogs!

The next scribe is.............

LAURA!!!!!!!!!

Sunday, March 21, 2010

March 19th Class

Today in class we finally got our Super Heroes back!!!! Some of us posted pictures of our Super Heroes on the bulletin board right outside the Science classroom.

After doing that we went over the Work & Power Math 2 Problems we had for homework.


Some of the questions we did were.....

Question 2.
If 562.3 J of work are used to move a smart car 15.1m, what is the amount of force applied to that smart car?

Formula: W=Fd or F= W/d

Plug: F= 562.3 J/15.1 m

Chug: F= 37.24N

While going over our homework, we also did a quick review on our units and formulas for our quiz on Tuesday.
Here are the units and formulas for Work and Power!

Work = Force x Distance

Power = Work/Time

Work = J (joule)
Force = N (Newton)
Distance = m (meter)
Time = s (second)
Power = W (Watts)

After doing that we went to the computer lab to test another Gizmo. This time was also about inclined planes, however it was harder from what we did last time. We were changing the angle of the inclined plane and the weight of the object falling down the inclined plane to find more about the inclined plane.
So this is what we did in class on Friday. And.........
DON'T FORGET TO STUDY FOR THE QUIZ!!!!!
Study Textbook 108-118, 124-133, also practice solving the worksheet.
If you have questions you should ask Ms.D on Monday.
Be sure to bring your CALCULATOR on the Tuesday.

The next person to scribe is...................
GIO!!!!!!!!!!!!!!!!!!!!!!!!!!!!!!